Headlight Adjustment With Chart

By going through this article, one will know about Cost of replacing headlight bulb, Headlight adjustment process, Difference between Halogen and LED bulb and top headlight restoration kits.
Headlight adjustment is an easy task. But most often it seems very tedious. That’s because the correct procedure to adjust headlights is not followed accurately. In this section, you will get some inevitable instructions and tips of adjusting headlight easily.
Car Parking: Park your car on a flat ground. Make sure your car is level in all the four corners. It’s important to make your car level because without it, headlight adjustment would be faulty.
Tips: How to level the car? To make your car level, you need to do the following tasks-
- Unload heavy cargo
- Fill the gas tank.
- Make sure that all the four tires are level.
Lights on Wall: Next find a wall. Then pull your car close to the wall as much as you can and turn on the headlights. By this way, you will find the center of low beam headlights. Mark both spots with a horizontal tape.
Find Headlight Adjusters: Generally, the adjusters are a type of belt or screw though it depends on car brands. As the adjusters are nor often marked, the adjuster’s grey or silver color makes it easier to find out.
Lining things up: After finding the adjusters, take back your car away 25 feet from the wall. This distance varies with car brands such as- In Toyota cars, this aligning should be 10 feet.
Fix the Aim: After backing up, block one headlight. Now, look at the beam fall to compare with the markings you made on the wall. You have to fix both the horizontal and vertical aim of the headlight. Otherwise, headlights may distract you while driving.
Vertical Aim: Look at the top most intense part of the beam. If it is at or beyond the horizontal tapeline on the wall, you have fixed the vertical aim of your car’s headlight.
Horizontal Aim: The top most intense part of the low beam should be at the right of the horizontal tapeline on the wall. If it is so, you will be done.
Now, what will you do if the top beam is not in the recommended direction? All you need to do is to use the headlight adjusters of your car. Just turn the adjuster quarter of a turn to see where the new alignment falls. Do it again and again until both the horizontal and vertical aims are adjusted. Also check out headlight is clean or not before go for the adjustment. We have a article related to Using Toothpaste to Clean Headlights on this.
Tips:
- Tape, marks low beam headlights, must go through the Centre.
- Keep your car straight while backing from the wall.
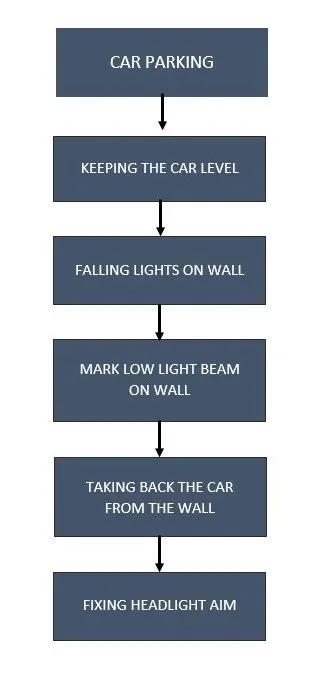
Headlight Adjustment Chart:
All the steps to adjust headlight of a car is shown below through a flowchart. Before that if you want you can check out compare article about 3156 vs 3157 Bulb for better understanding.

Headlight Adjustment Cost
The cost of headlight adjustment in our research around the country was $35 on average. The shops we surveyed charged less than half that amount for labor alone, which is a comparatively inexpensive price when it comes to headlights. Overall, this is an inexpensive car maintenance task compared to others you might need done every couple years.
Conclusion:
Headlight Adjustment is an easy task. I hope after reading this article, one will be able to adjust headlights. If you have any queries, feel free to ask through comments and check our articles on Headlight Restoration Kits for more information about headlight restoration kits.
Frequently Asked Questions (FAQ)
There’s no need to call a mechanic every time you need to adjust your headlights. With a few simple tools, you can do it yourself in just a few minutes.
First, park your car in front of a flat surface like a garage door. Then, turn on your headlights and measure the distance between the center of the headlight beam and the ground. The ideal distance is about four inches (10 centimeters).
If your headlights are pointing too high or too low, you can adjust them using the adjustment screws on the back of the headlight assembly. To raise the headlights, turn the screws clockwise. To lower them, turn the screws counterclockwise.
It’s important to get the adjustment just right. If your headlights are pointing too high, they may blind oncoming traffic. If they’re pointing too low, you won’t be able to see the road as well at night.
With a little patience and some trial and error, you can adjust your headlights yourself without having to pay for a mechanic to do it.
